Timestamps:
0:07 – Adjust the quality settings
2:57 – Quality options
4:23 – Export Speed
4:51 – Export Resolution
Transcript:
Hey, everybody, it’s Craig with Clipscribe and in this video tutorial, I’m going to show you how you can adjust the quality settings when you export your video. So, let’s jump right into that here. When you are on the editor page up here next to the save and make buttons in the copy, there’s a little gear icon up here. ![]()
So when you click that it’s going to give you some quality options that you can adjust now by default, I recommend that you don’t mess with these. Okay. And the reason for that is that it’s going to significantly increase the export time of your video. 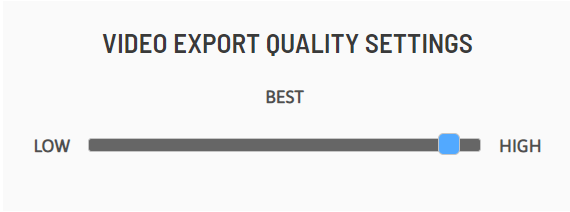
So, typically you can expect if you have a video that is, let’s say 5-minutes long, you can expect it to take about 5-minutes to export about 1-minute per minute. Alright? But that’s at the default settings. Once you start upping up the quality setting and the encoding speed, it can double, triple, and quadruple how long it’s going to take to export your video.
Now, if your video is 30-minutes long then that means it could take you 2-hours potentially to export your video. So, I do encourage you to consider that the other thing that you want to consider is and this is if you’ve already exported your video and you say other quality doesn’t look that great. Okay, so the first question is, what was the original video that you uploaded? The problem almost always lies with your original video because if you upload a very low-resolution original, you’re going to get a low-resolution export and it’s actually probably going to look worse because it has been encoded again and you’re going to see the text that we’re going to add on it and everything. 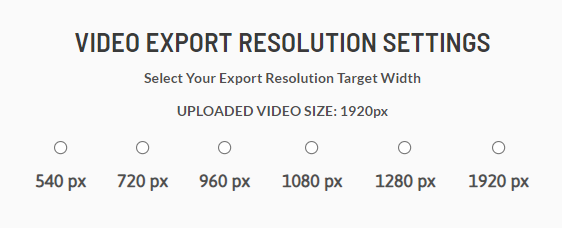
It’s going to be much more clear, especially if you have text on their video itself if it’s just people or objects, sometimes you can get away with it, but once you start adding in text, it’s a lot easier to see, you know, a quality difference between the video. So, 1280×720 HD is what I recommend at least.
And ideally, you know, full HD 1920×1080 upload that and you should be fine. You probably aren’t going to need to mess with these settings at all. Okay. But if you do, they’re here so let’s go over your options are like I just mentioned you’ve got three options, two of these relate to the actual quality of the video itself and one of these has to do with resolution.
So what’s the difference? Well, quality is if you’ve ever seen an image on the internet, a JPEG image, you know how they always say in the movies enhance and they zoom in and it’s all blurry, that would be quality, the blur the jaggedness around the edges of things.
It just refers to how compressed the video is, and how poorly compressed or how well it has been compressed. Right, and, you know, the file size does not tell you how great the quality of the video is, it’s just like a smartphone here I have a smartphone that is more powerful than computers that used to fill up in an entire room.
So, don’t assume that because the file size is low, that the quality is not great because quality has improved and file sizes have got smaller so, you can adjust the quality setting here and the default is going to be basically right in the center. And like I said, that’s what I would recommend if you want to play with it, you can move that up as well.
And then we have export speed, that’s also going to affect quality. 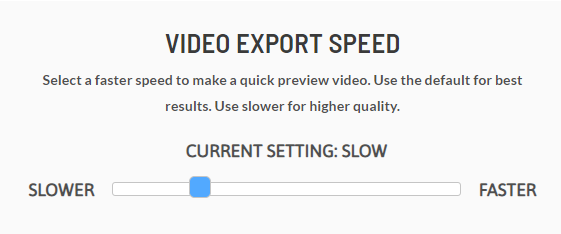
It’s how long it’s going to take to encode, the longer it takes, the more it’s going to process. And so you can improve quality to some extent by making the speed slower. Those two options to mess with, just as far as quality goes, compression and quality of compression basically.
Now, the other thing you have is that you can adjust the export resolution setting. So by default, when you upload your video to Clipscribe, we’re going to export it at whatever you uploaded at. So, if you uploaded it at 1920×1080 regular HD that’s what we’re going to export it at.
If you uploaded it at a crazy low resolution, like 360×270 we’re going to export it at that and the reason for that is because you’re going to get out what you put in and we don’t want to be messing with the resolution of your original video. Because when you get it out, there are certain things you’re going to look at, you’re going to say, why does this not look the way I think it should look.
So there are several reasons why we do that. But you’re going to get out what you put in now with this option, you can say, hey, no, don’t give me what I put in. Give me a higher resolution that I put in. And the reason that I recommend using this is that if your video is really low resolution, okay. As I said, when you export it, we’re going to export the whole thing at that resolution.
And so that the text, the headlines you put in the countdown, the emojis, they’re all going to be very low resolution. And when you upload it to a social network, you know, they’re going to blow it up and it’s going to look bad. So, if you have a video that is really low resolution, there’s nothing you can do about it.
You know, maybe you’re doing a client’s videos or something and they just gave you what they gave you, then you can adjust this setting. And what that’s going to do is at least the text, the design bars, the countdown at least everything else is going to be high resolution, okay, now we’re going to have to blow your video up to match right? If your original video was really tiny, we’re going to blow it up and that’s part of where the quality is going to degrade and it’s going to look even worse.
But at least everything else will look crisp and clear, and as I said, you can get away with your video of people or objects or places looking for quality. And you almost trick the minds of your viewers by having the text and the design bars and any logos or images be high resolution, even if your video is low resolution, so you can choose that setting and that’s just going to be upraised everything.
And if you choose that, then you can decide whether or not you want to mess with these other quality factors. But as long as you choose, you know, the highest option there, then at least everything else is going to look good when you export your video. So just be aware of that.
So when you make these, when you submit these settings, by the way, these are universal settings. So they’re going to apply to other videos as well. So if you need to change those, just pop in and change it before you do your export because once you save these settings they’re going to be saved universally.
That’s something that we’ve got kind of got a video deal coming up. Well at least you’ll be able to review the settings but for now, just be aware that those settings are going to be universal. So if you just want to change it for one video, so make sure you go back in and re-adjust those settings at some point.
Alright, hopefully, that helps you understand a bit about quality. I recommend looking at your download from Clipscribe before messing with it. You know, check it out. See if everything looks good. If it looks good, if it looks clean, I wouldn’t mess with the quality settings unless it’s clear that you have an issue, then I almost always recommend you go back and look at the resolution of your original video first to make sure you didn’t upload a really low-resolution video in the first place.
Hopefully, this helps you out. Let me know if you have any questions.