Timestamps:
00:19 – How to export your video transcript to our Blog Editor
00:25 – Use of in-progress tab
01:00 – Blog Editor button
Transcript:
Hey, everybody, it’s Craig with Clipscribe. In this tutorial video, I’m going to show you how to export your video transcript into our blog editor so that you can work on it and then copy and paste it into your blog. So, let’s jump right into that here. You can do this a couple of ways from the in-progress tab.
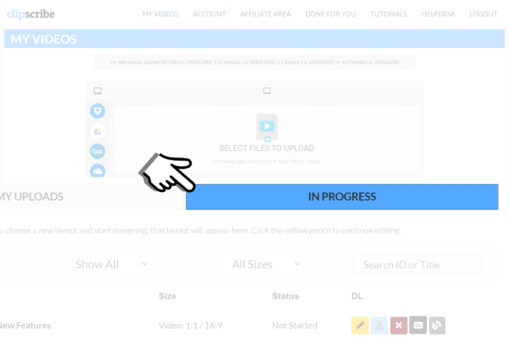
The Clipscribe Uploader is on the My Uploads Page
Once you upload your video, you have this in progress tab right here and you can click that’s going to list all the versions of your videos that you’ve worked on. Actually, let me reload that up here and you’ll see a blog button right here. This little gray blog button that’s going to open up the blog editor.
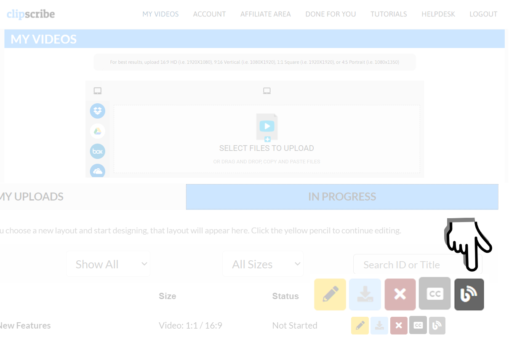
The Blog Editor can be found on the In Progress tab
So that’s one way to do it. Another way to do it is from the video editor here. You come over here to the export tab, just right here, click that and you’re going to see a blog button right there. Okay, when you click that, it’s going to open up a new window and it’s going to have your blog text in it.
So where is this text come from? So you can know how this works. It’s going to grab it from your subtitles, your edited subtitles. So, I always recommend people to go and edit their subtitles for their video first so that you work out all the kinks you know get rid of any spelling issues or you know other problems with grammatical issues or whatever it could be.
Do that first. Editing your subtitles in the video editor and then once you’ve edited them click the blog button to open up your blog in the blog editor. Now be aware that this is always going to come straight from your subtitles when you load it up first. So if you want to save a revision that’s what this save revision button is for.
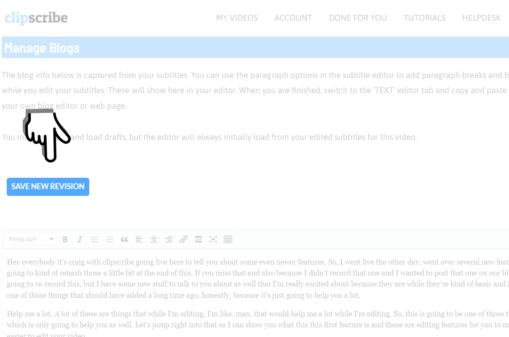
Save New Revision button is on the Manage Blogs Page
So you’re going to want to click that. If you’re going to save a revision you can type a name for it up here and save it okay and you can update it or delete it and then when you refresh this page now like I said it’s still going to load it from the subtitle editor but now you can load up your saved revision over here on the right you can click load and that’s going to grab that saved revision that you have just created and save now once you’ve gone through and you’ve edited this and you’re going to see this one’s been pre-edited.
Actually, within the subtitle editor, I’m going to show you how to do that on a different video. But, once you’ve gone through and edited it as you want to then you’re going to copy and paste it to your blog if you want to copy it, like you know, just simply select all copy and paste.
If you need to copy the HTML, come over here to this text button and click this text button and that’s going to give you the HTML version, copy it, take it into your blog and paste it into your blog, click publish and you’re going to be good to go there.
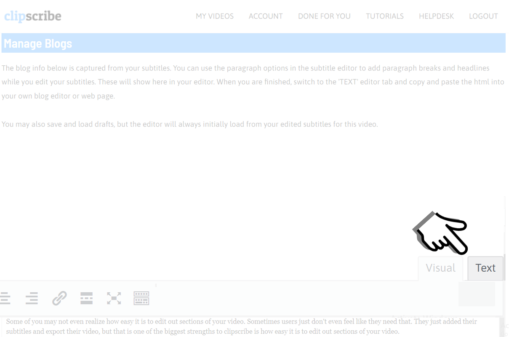
Subtitle Editor is on the Manage Blogs Page
So that is how you use the blog editor. And also, by the way, any edits you make in the subtitle editor specifically, if you edit out sections of your subtitles, so if you’re not aware, if you click this little eye icon here, it completely edits out that section of your subtitles, that block.
And so just be aware that if you edit out any of these blocks, that text is not going to show up in the blog header we’re going to assume that you want it to edit it out. And so that’s how that’s going to go for you. So just be aware that is going to be the case.
So let me know if you have any questions or anything we can do to make this better for you. Let me know about that.