Uploading Videos
Countdowns
Substyles (Word by Word Design and Customization)
Subtitle Editing
Design
Thumbnails and Still Graphics

How to Upload Your Videos to ClipScribe
In this Clipscribe video, we will talk about how to upload your videos to Clipscribe and try to make it as easy as possible for you
How to Create & Use Countdowns
In this Clipscribe video, we will show you how the use countdowns, how to create your own countdowns and integrate them into your videos.

How to Add Your Own Logos and Images to Your Videos
In this video, we will show you how to add your logo or other similar images or icons, to your video.
How to Edit the Design Bars
In this Clipscribe video, it talks about how to edit the design bars on your video.

Editing the Text in Your Subtitles
In this Clipscribe video, it talks about how to edit text in your subtitles.

How to Edit Out Parts of your Videos
This video talks about the whole purpose of Clipscribe to help you create more attention-grabbing content easier and efficiently.
How to Import and Export SRT Files
In this Clipscribe tutorial video, we will show you how to both download an SRT file for your subtitles and also upload an SRT file.
How to Completely Remove Subtitles from Your Video
This Clipscribe tutorial video will show you how to remove your subtitles entirely or in sections.

Adding Timed Text and Emojis
In this video, we will show you how to add timed logos, images, emojis, and headlines to your video
Copying Designs To Other Layouts
In this video, we will talk about how to copy your design from one layout to another layout making it easy to create mutliple versions of the same video for various platforms with the click of a button.

Exporting Your Finished ClipScribe Video
In this Clipscribe tutorial video, we will show you how to export your finished video.
Choosing Layouts and Templates
In this ClipScribe tutorial, we show you how to choose a layout when starting your first video project. Also, we cover choosing a template to start designing your video quickly.
Editing the Text of Your Subtitles
Timestamps: 00:29 – Where is the CC tab 02:07 – Toggle Upper/Lower Case Transcripts Hey everybody. Craig Lillard here and I am going to show you how to edit the text in your subtitles assuming you have subtitles so let’s jump right into it. So, this is another tutorial that I’m working on myself using …

Adding Headlines to your Videos
This Clipscribe tutorial video talks about how to add headlines to your social media video
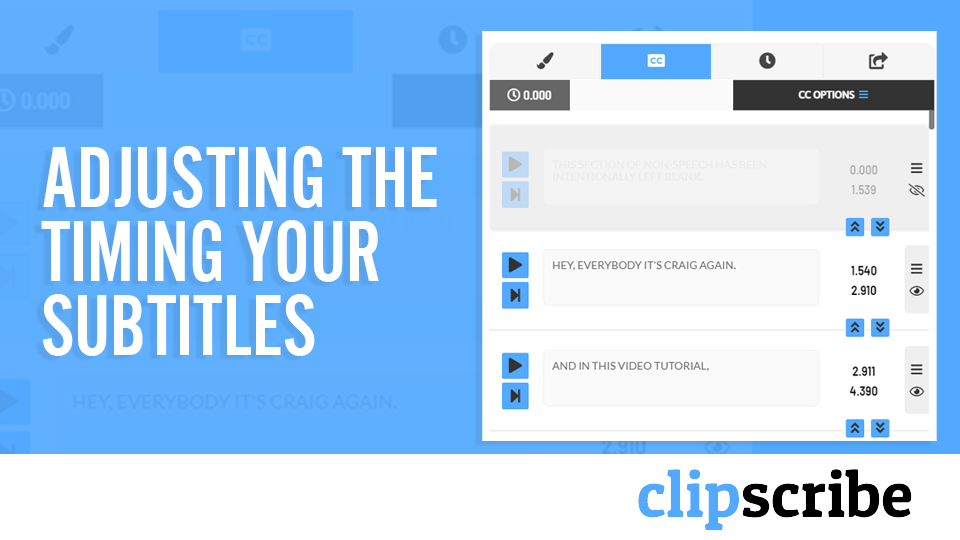
Adjusting the Timing of your Subtitles
In this ClipScribe tutorial, we show you how to adjust and fine-tune the timing of your subtitle blocks and your video.
Cloning your Video and Subtitles
In this ClipScribe tutorial video, Craig shows you how to copy your entire video and subtitles on different versions of social media videos
Adjusting the Snap Options in the ClipScribe Editor
Looking to adjust the snappiness of your text and images within the ClipScribe editor? We go over the snap tools and options in this tutorial video.

Using the ClipScribe Canvas Feature to Change Background Colors
In this tutorial video, we will talk about how to use the ClipScribe canvas to change the background of when editing your ClipScribe videos.

Adjusting the Zoom Positioning of your ClipScribe Videos
This tutorial video will show you how to adjust the zoom positioning of your video within the ClipScribe editor.
Adding Circles and Shapes to your ClipScribe Videos
This Clipscribe video talks about adding circles and shapes that will help you grab your audiences attention and will provide you a number of new design options for both your videos and your thumbnails.
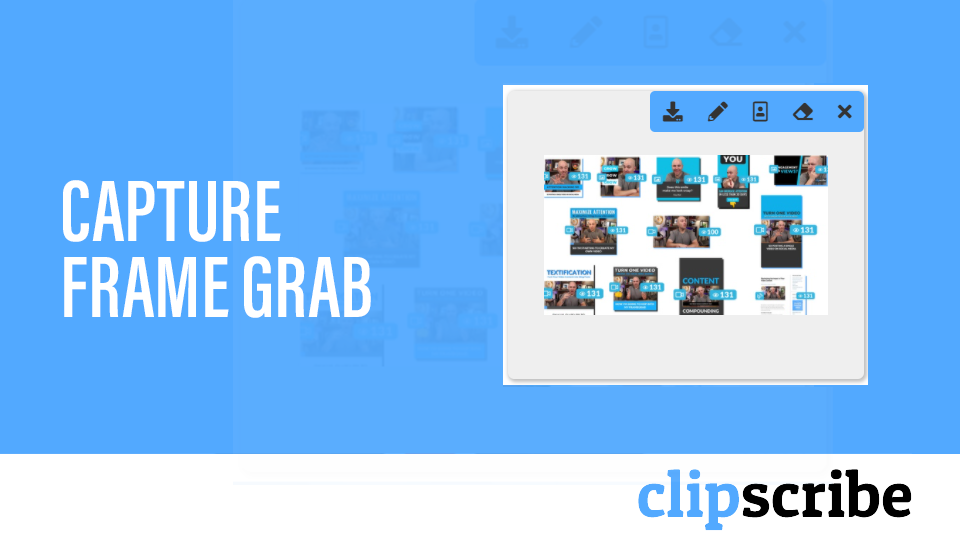
How to use ClipScribe to Capture a Frame Grab from your Video
In this Clipscribe tutorial video, we will show you how to capture frame grabs from your uploaded videos which you can then use for video thumbnails or still graphics.

How to Remove Background from Your ClipScribe Frame Grabs
One of the coolest new features ClipScribe offers is frame grab capture and the ability to remove the background from those frame grabs. In this video, Craig shows you how to do it!
How To Add a Call To Action To Your Video
Timestamps: 0:20 – Adding Text or URL 2:30 – What is Time Adjuster Transcript: Hey, everybody, it’s Craig with Clipscribe. Got another tutorial for you. So, somebody literally just asked me today, hey Craig, how do I add a call to action to my video? So that’s what we’re going to look at right …

How to Create a Great Looking Thumbnails
Timestamps: 2:34 – Choose your still image 3:02- What is Frame Grabbing tool 3:38 – How to Remove background 3:47 – Create thumbnail image 3:59 – How to choose templates 4:41 – Hide element outside the canvas 4:47 – How to Add shapes Transcript: Hey, everybody, it’s Craig with Clipscribe. I’m going to show …
How to use the Clipscribe Blog Editor
Timestamps: 00:19 – How to export your video transcript to our Blog Editor 00:25 – Use of in-progress tab 01:00 – Blog Editor button Transcript: Hey, everybody, it’s Craig with Clipscribe. In this tutorial video, I’m going to show you how to export your video transcript into our blog editor so that you can …

How to Use Subtitles Editor For your Blog
Timestamps: 00:20 – How to export your subtitles 01:25 – Types of edits within the Blog editor 01:11 – Use of Paragraph Icon Transcript: Hey everybody, it’s Craig with Clipscribe. In this tutorial video, I’m going to show you how to use the subtitle editor to kind of prep your text for the blog …

Clipscribe Quality Settings
Timestamps: 0:07 – Adjust the quality settings 2:57 – Quality options 4:23 – Export Speed 4:51 – Export Resolution Transcript: Hey, everybody, it’s Craig with Clipscribe and in this video tutorial, I’m going to show you how you can adjust the quality settings when you export your video. So, let’s jump right into that …
How to Add Transitions Using Clipscribe
Timestamp: Hey everybody it’s Craig with Clipscribe and in this quick beta system tutorial, I’m going to show you how to use transitions! Again, we’re still in beta but I wanted to make these little tutorial videos just to give you an idea of how to do some of the most important things. …
How to Add Timed Elements to Clipscribe Beta
Timestamp: How to Add Timed Elements to Clipscribe Beta Hey everybody it’s Craig with Clipscribe in this quick beta tutorial, I’m going to show you how to add timed elements to your video. This has changed a little bit from the way we used to do it before. So, I want to show you …
How to Create and Edit Substyles on Clipscribe
Timestamp: How to Create and Edit Substyles on Clipscribe Hey everybody it’s Craig with Clipscribe and in this quick beta tutorial, we’re talking about the new beta system on Clipscribe. I want to show you real quick how to add and create substyles to use in your videos. So what are substyles they are …
How to Merge Words in Your Subtitles (Word by Word Editor)
There are a couple of reasons you might need to merge words together. 1. The words needing to be merged are meant to be a single word. i.e. Clipscribe as in the example in the video. In this case, you want to use the button in the word pop-up options which will merge the two …
How to Merge Words in Your Subtitles (Word by Word Editor) Read More »
Adding Inline Emojis to Your Subtitles
In the new ClipScribe word by word (Substyle) editor you can add emojis inline (alongside your subtitles.) (*If you are wanting to add an emoji as an element like an image or logo, check out the tutorial on adding static or timed emojis.) There are two ways you can do this: Click the emoji icon …
Move Words Between Subtitle Blocks (Word by Word Editor)
This tutorial applies to the word by word (Substyle) editor only. When using the word by word editor, it is important to ensure that word timings are preserved. If you have a word that needs to be moved to another block or repositioned, you can push or pull words between blocks. Pushing or pulling …
Move Words Between Subtitle Blocks (Word by Word Editor) Read More »
Deleting Words from Your Video
If you need to completely remove a word you can delete it. However, if you just want to edit the word or replace it, it is much better to change the word than try to completely delete it and add a new word from scratch. This is so you preserve the original word timing. But …
Adding Line Breaks to Your Subtitles
You might want to control where a line break appears to control how your subtitles display. There are two ways to insert a line-break. ADDING A LINE BREAK BY SELECTING A WORD Click the word you would like to insert a line break after. Either click the line-break icon or use the shortcut SHIFT-ENTER. …
Setting Up Your Primary Subtitle Design, Colors, Fonts
You can style your subtitles without using Substyles by using the Subtitle design editor in the main static design area. Click the design pencil to access the static editor. In this area, you add and edit global settings for static elements (headlines, emojis, etc. that stay on-screen the entire video), global subtitle settings, …
Setting Up Your Primary Subtitle Design, Colors, Fonts Read More »
Add Timed and Static Elements (Emojis,Headlines,Images,Logos)
You can add both static and timed elements to your video like Emojis, Logos, Headlines and shapes. ADDING STATIC ELEMENTS Static elements will stay on-screen for the entire video. Click the blue tab in the image below to reach the static editor. Then you can use the icons at the top to add static …
Add Timed and Static Elements (Emojis,Headlines,Images,Logos) Read More »
Edit Out Parts of Your Video
If you want to edit out part of your video, this is very easy and is done on a Subtitle block basis. Simply click the eye icon to the right of any subtitle block to edit the entire block out. This doesn’t remove the subtitles, it fully edits out that part of the video …

Add Substyles to Individual or All Words
Substyles are subtitle designs you can add to individual words or all the words in your video. Substyles give you word by word control over how your subtitles look and feel. You can manage your Substyles using the Substyle manager. Access the Substyle manager using this icon: You can also access the Substyle manager …
Editing Your Subtitles
EDITING WORDS To edit a word, first click the word to select it. Then click it again to enter edit mode. To exit edit mode, you can click out (anywhere else on the screen). SHORTCUTS When a word is selected you can press the ENTER button to enter edit mode and ENTER again to …